Yamaha MTX3 Manual Page 19
- Page / 201
- Table of contents
- TROUBLESHOOTING
- BOOKMARKS
- MTX Editor 1
- User’s Manual 1
- Contents 2
- ● Emergency mode 5
- Data handled by MTX Editor 6
- 2on previous page) 8
- 4on previous page) 8
- 5 on previous page) 8
- What are YDIF connections? 9
- MTX Editor User’s Manual 10
- What are Dante connections? 12
- ❑ About redundant networks 13
- Patching 14
- YDIF or Dante 15
- Workflow 16
- EXT. I/O screen 17
- MAIN screen 17
- “Input Patch” dialog box 18
- Port select 18
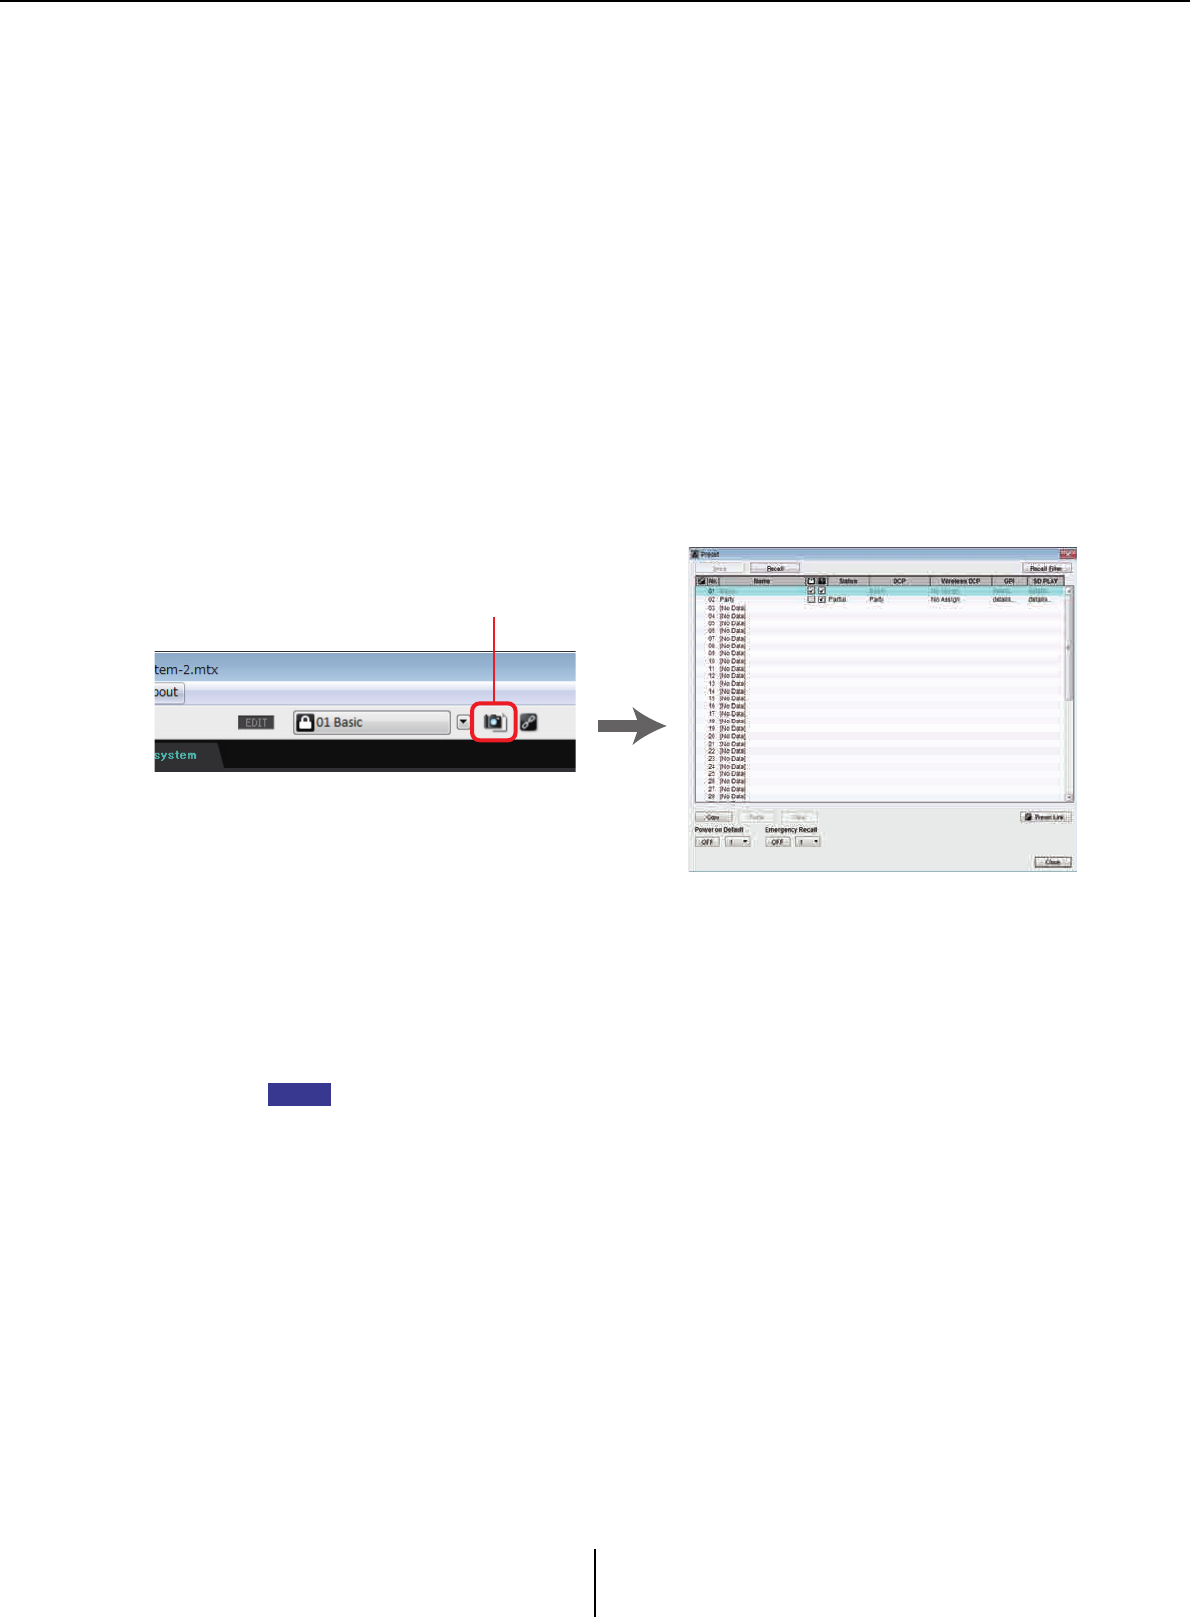
- “Preset” dialog box 19
- Preset button 19
- Save the project file 22
- About the screens 23
- Moving between screens 24
- Title bar 25
- Menu bar 25
- Tool buttons 28
- Chapter 3. Project screen 30
- Network devices 31
- MTX system 32
- • [UNIT ID] box 36
- •[YDIF MODE] 36
- • [< Back] button 38
- • [Next >] button 38
- • [Finish] button 38
- Identify button 39
- • [Print] button 41
- • [Close] button 41
- ❑ YDIF-connected devices 42
- ❑ Digital control panel 43
- ❑ Analog-connected devices 44
- ❑ DANTE-connected devices 45
- [System] tab 46
- [Device] tab 47
- [Alert] tab 49
- Screen select buttons 51
- “MAIN” screen 53
- Input channels 54
- Stereo input channels 58
- Effect return channels 59
- Direct input channels 59
- Output channels 60
- ❑ “Input Patch” dialog box 62
- ❑ “Output Patch” dialog box 63
- “INPUT” screens 64
- ● Screen selection 65
- “GAIN/HPF/EQ” screen 66
- “GATE/COMP” screen 68
- “FBS/AGC” screen 70
- • AGC [ON] button 72
- • [COMPENSATION LEVEL] knob 72
- • [RESPONSE TIME] knob 72
- • [NOISE GATE] button 72
- “GAIN/EQ” screen 73
- “COMP/AGC” screen 73
- “MATRIX” screen 74
- Send level 75
- •[ON] button 76
- Setting the input channel mix 77
- “ZONE” screen 78
- *1 DISTRIBUTION MODE only 82
- • OSCILLATOR [ON] button 83
- •WAVE FORM 83
- • Output [LEVEL] knob 83
- “OUTPUT” screens 84
- “DELAY/ROOM EQ” screen 85
- •ROOM EQ [ON] button 86
- ■ Pre-installed LIBRARY 87
- ■ [SP GRAPH] tab 87
- ■ [PEQ GRAPH] tab 88
- ■ CROSSOVER 89
- ■ [HIGH] tab/[LOW] tab 90
- ■ LIMITER 91
- “EFFECT” screen 92
- “DCA” screen 94
- “MY4-AEC” screen 96
- Common items 97
- ❑ “To Far-end” screen 99
- ❑ “Near-end Voice” screen 100
- ❑ “Mic” screen 101
- “EXT. I/O” screen 102
- “YDIF Out Patch” dialog box 104
- “Channel Select” dialog box 104
- “YDIF In Patch” dialog box 104
- ❑ “YDIF In Patch” dialog box 105
- ❑ “YDIF Out Patch” dialog box 105
- ❑ “Channel Select” dialog box 106
- YDIF output 107
- ❑ “ANALOG” screen 108
- ❑ “Line Out Patch” dialog box 109
- ❑ “DANTE” screen 110
- ❑ “Dante In Patch” dialog box 111
- “XMV” screen 112
- Chapter 4. System screen 113
- ❑ “XMV Patch” dialog box 114
- “EXo8” screen 115
- ❑ “EXo Patch” dialog box 116
- • [To Device] option button 117
- • [From Device] option button 117
- • [OK] button 117
- •[Cancel] button 117
- • [Detail] button 118
- Progress bar 119
- Message area 119
- Synchronization 121
- Chapter 6. Presets 123
- • [OFF]/[ON] toggle button 125
- • Preset select box 125
- “Preset Link” dialog box 126
- “Settings” dialog box 127
- MTX select buttons 128
- ■ “GPI Out” dialog box 129
- ■ “SD Play” dialog box 130
- • [Interval Time] 132
- Recall Filter setting screen 133
- ■ [Apply] button 134
- ■ [Close] button 134
- ■ [MTX] tab 134
- “L” side 135
- ■ [External I/O] tab 137
- Chapter 7. Dialog boxes 138
- ❑ “Network Setup” dialog box 139
- •Battery 141
- “Update Firmware” dialog box 142
- ■ Update procedure 143
- “IP Address” dialog box 144
- • INPUT PORT SETUP 146
- • INPUT CHANNEL SETUP 146
- •MATRIX BUS SETUP 147
- • CASCADE MODE 147
- • OUTPUT CHANNEL SETUP 147
- ❑ “Word Clock” dialog box 150
- • [Word Clock Fs:] box 151
- ❑ “Clock” dialog box 152
- • Start time 154
- •End time 154
- 20:00 10:00 155
- 20:00 12:00 155
- ● [Month] button/[Day] button 156
- • [Type] box 158
- • Settings 158
- If you chose Preset Recall 159
- If you chose GPI Out 159
- ❑ “Remote Control” dialog box 163
- ❍ Control select buttons 166
- ❑ “Wireless DCP” dialog box 168
- ❑ “GPI” dialog box 169
- <Usage example 3> 170
- “Log on” dialog box 174
- ❑ “Get Log” dialog box 176
- Appendix 178
- ■ Switch 179
- •Input Ch Send ON 180
- •Fx RTN Send ON 180
- •SD Song Select & Play 180
- •SD Song Pause 180
- If [Play 1 song] is selected 181
- ❍ [MTX] 182
- ❍ [PARAMETER1]/[PARAMETER2] 182
- ✦[Upper Limit] 182
- ✦[Minimum] 182
- ■ Knob/Slider 185
- •Input Ch Send Level 186
- •Fx RTN Send Level 186
- ■ GPI Input 187
- •Input Ch Level 189
- •Fx RTN Level 189
- •ZONE Out Level 189
- ■ GPI Output 191
- • Closed 192
- • Pulse Inv 192
- Alert list 195
- Alert list Appendix 196
- Troubleshooting 200
- 409IP-D0 201
Related products and manuals for Processors Yamaha MTX3


 (40 pages)
(4 pages)
(40 pages)
(4 pages)
 (72 pages)
(12 pages)
(8 pages)
(18 pages)
(11 pages)
(12 pages)
(42 pages)
(16 pages)
(49 pages)
(72 pages)
(12 pages)
(8 pages)
(18 pages)
(11 pages)
(12 pages)
(42 pages)
(16 pages)
(49 pages)
 (15 pages)
(28 pages)
(149 pages)
(76 pages)
(15 pages)
(28 pages)
(149 pages)
(76 pages)
© 2020, manymanuals.com. All rights reserved. | 1.137 s |
 Manymanuals.com
 Manymanuals.de
 Manymanuals.fr
 Manymanuals.it
 Manymanuals.pl
 Manymanuals.cz
 Manymanuals.es
 Manymanuals-pt.com
Comments to this Manuals