Yamaha SPM-K1 Owner's Manual Page 5
- Page / 52
- Table of contents
- BOOKMARKS
- WALL MOUNT BRACKET 3
- Installation Manual 3
- SAFETY INSTRUCTIONS 3
- ACCESSORIES 4
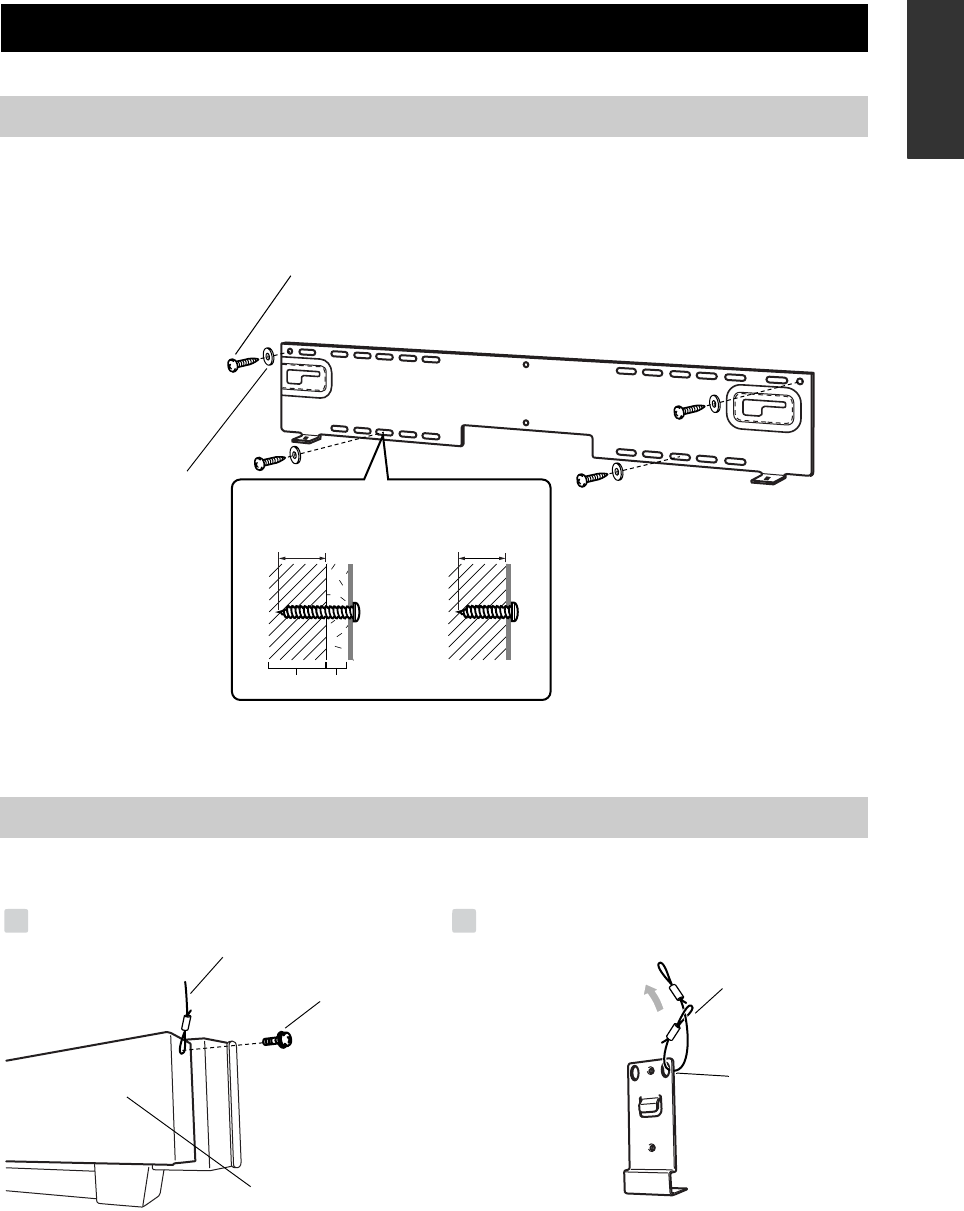
- INSTALLATION PROCEDURE 5
- Secure the unit 7
- Manuel d’installation 9
- INSTRUCTIONS DE SÉCURITÉ 9
- ACCESSOIRES 10
- MÉTHODE D’INSTALLATION 11
- Soundprojektor-Wandhalterung 15
- Installationsanleitung 15
- SICHERHEITSANWEISUNGEN 15
- ZUBEHÖR 16
- INSTALLATIONSVORGANG 17
- Sichern Sie das Gerät 19
- SÄKERHETSFÖRESKRIFTER 21
- Installationsanvisningar 21
- TILLBEHÖR 22
- MONTERINGSÅTGÄRDER 23
- Skruva fast ljudprojektorn 25
- Manuale di installazione 27
- NORME DI SICUREZZA 27
- ACCESSORI 28
- PROCEDURA DI INSTALLAZIONE 29
- Fermare quest’unità 31
- Manual de instalación 33
- INSTRUCCIONES DE SEGURIDAD 33
- ACCESORIOS 34
- PROCEDIMIENTO DE INSTALACIÓN 35
- Asegure la unidad 37
- Installatiehandleiding 39
- VEILIGHEIDSINSTRUCTIES 39
- TOEBEHOREN 40
- INSTALLATIEPROCEDURE 41
- Zet het toestel vast 43
- の原因となります。 45
- 設置する前に同梱部品をご確認ください。 46
- 1 壁掛け金具(大)を壁に取り付ける 47
- 2 落下防止用ワイヤーを取り付ける 47
- 4 デジタルサウンドプロジェクターを壁に取り付ける 48
- 6 落下防止用ワイヤーを壁に取り付ける 49
- Printed in Malaysia WF53010 52
Related products and manuals for Projector mounts Yamaha SPM-K1


 (104 pages)

© 2020, manymanuals.com. All rights reserved. | 0.983 s |
 Manymanuals.com
 Manymanuals.de
 Manymanuals.fr
 Manymanuals.it
 Manymanuals.pl
 Manymanuals.cz
 Manymanuals.es
 Manymanuals-pt.com
Comments to this Manuals