Yamaha UX256 Owner's Manual Page 9
- Page / 34
- Table of contents
- TROUBLESHOOTING
- BOOKMARKS
- Owner’s Manual 1
- Bedienungsanleitung 1
- Mode d’emploi 1
- PLEASE KEEP THIS MANUAL 2
- SPECIAL MESSAGE SECTION 2
- PRECAUTIONS 3
- Table of contents 4
- UX256 Features 5
- Notes on USB 6
- Package Contents 7
- System Requirements 8
- Specifications 8
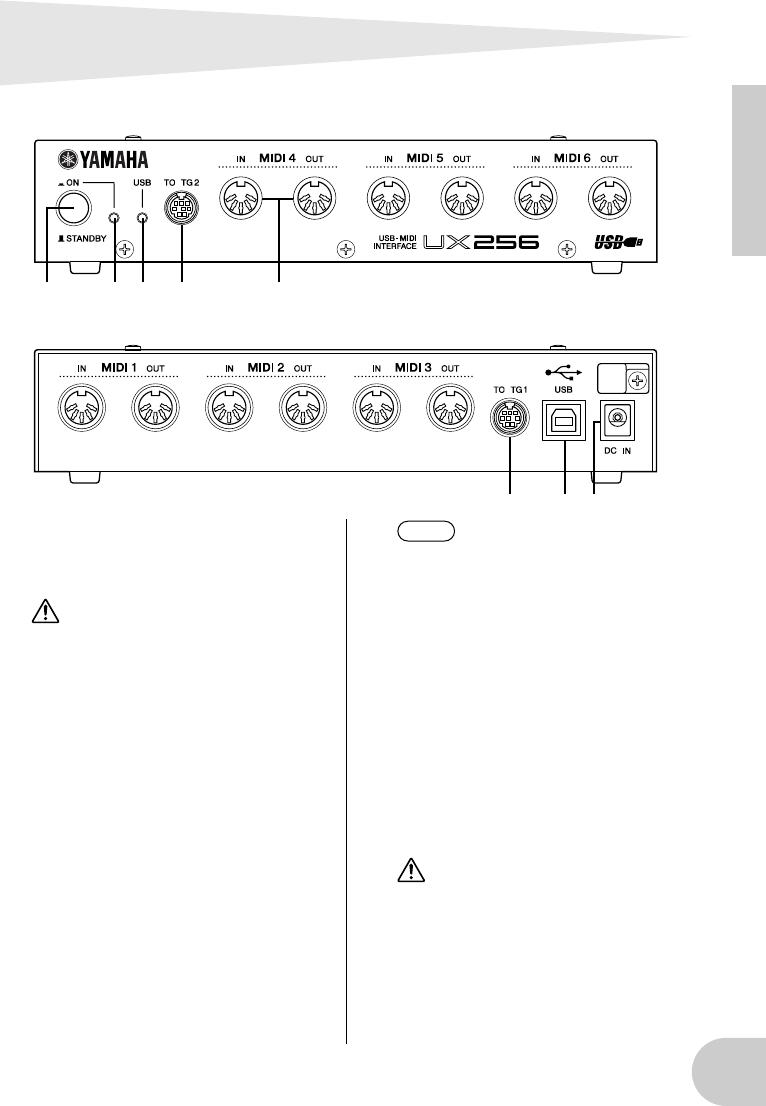
- Parts and Functions 9
- Connection 10
- USB cable 11
- (5) Connecting USB hubs 12
- Installing the Driver 13
- • Checking the installation 16
- • Connecting multiple UX256s 17
- • Using 2 or more UX256s 23
- Changing the driver set 24
- [Windows 98] 25
- [Macintosh] 25
- • Changing the device number 26
- • Checking the signal path 26
- 3 to MIDI OUT 1 on the UX256 27
- Troubleshooting (FAQ) 30
- FCC INFORMATION (U.S.A.) 32
Related products and manuals for Serial switch boxes Yamaha UX256
 (34 pages)
© 2020, manymanuals.com. All rights reserved. | 1.102 s |
 Manymanuals.com
 Manymanuals.de
 Manymanuals.fr
 Manymanuals.it
 Manymanuals.pl
 Manymanuals.cz
 Manymanuals.es
 Manymanuals-pt.com
Comments to this Manuals